![]()
Contributing to esphome-docs
Our documentation can always be improved. We rely on contributions from our users to do so. If you notice an issue (for example, spelling/grammar mistakes) or if you want to share your awesome new setup, we encourage you to submit a pull request (PR).
The ESPHome documentation is built using Sphinx and uses
reStructuredText for all source (.rst) files.
If you're not familiar with rST, see rST syntax for a quick primer.
Through GitHub
This guide essentially goes over the same material found in GitHub's Editing files in another user's repository. You may also find that page helpful to read.
At the bottom of each page in the docs, there is an "Edit this page on GitHub" link. Click this link and you'll see something like this:
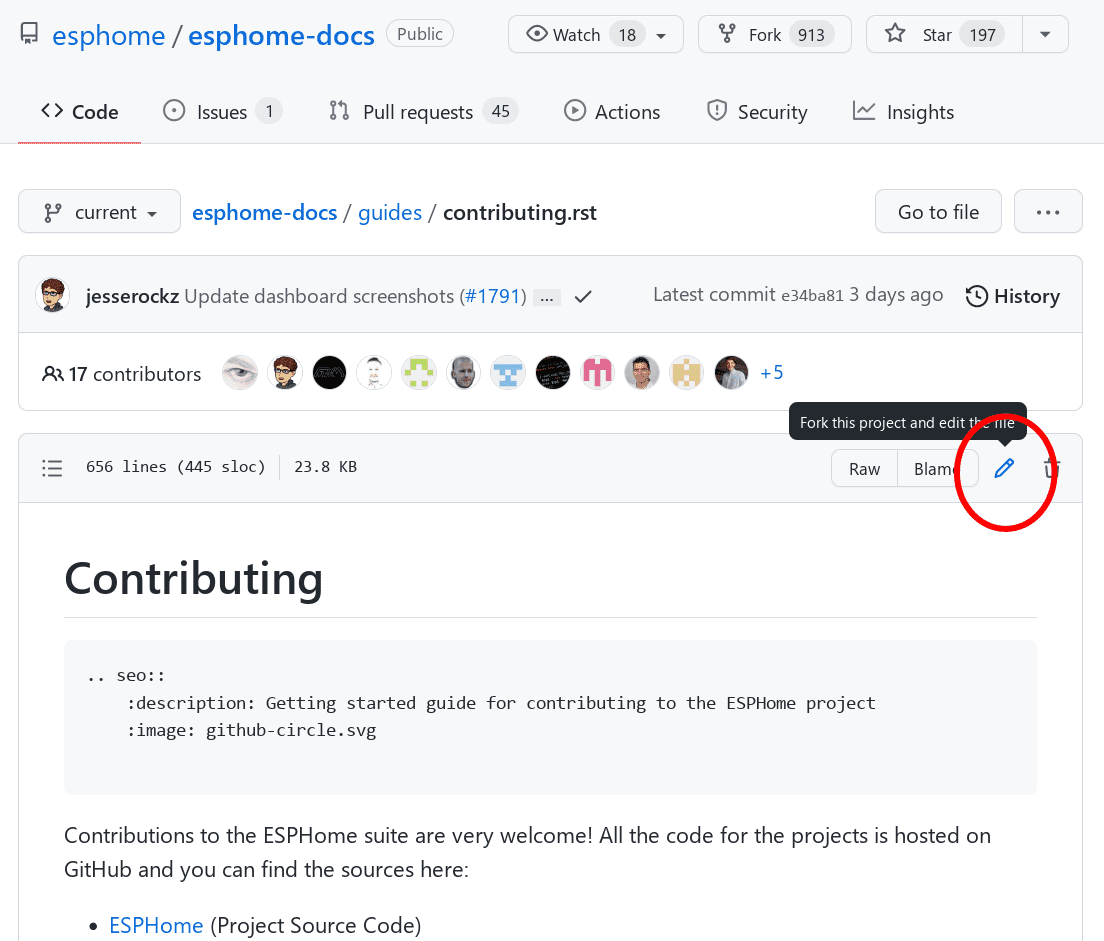
Click the edit button to start making changes. If you're unsure about syntax, see our quick primer.
Once you've made your changes, give them a useful name and click "Propose changes". At this point, you've made the changes to your own personal copy of the docs in GitHub, but you still need to submit them to us.
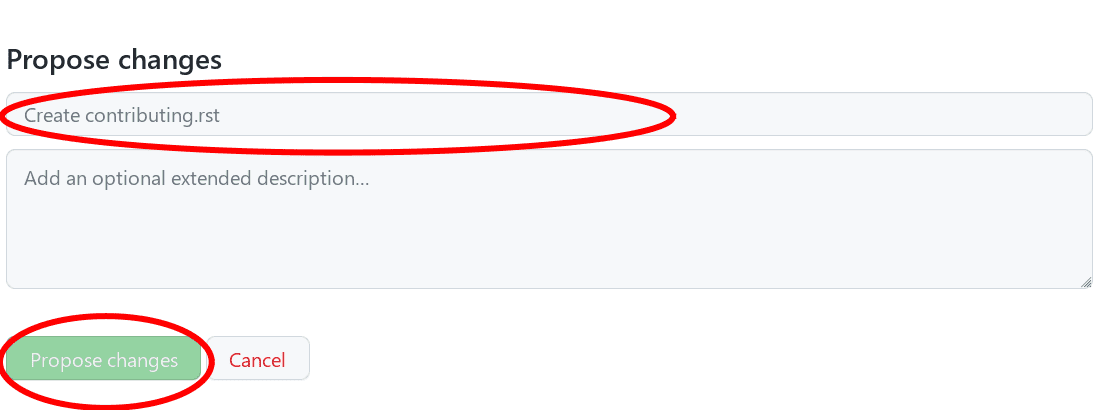
To do that, you need to create a "Pull request" (PR):

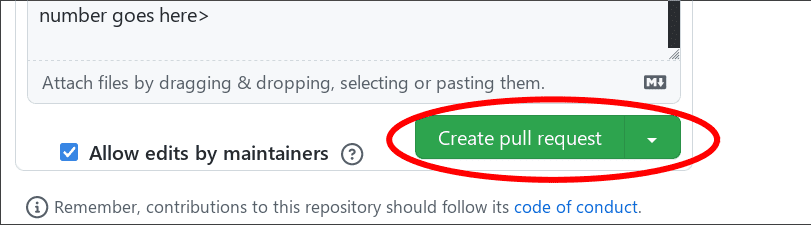
Complete the pull request form, replacing the [ ] with [x] to indicate that you have followed the instructions.
Note that there must be no spaces around the x when you populate it.
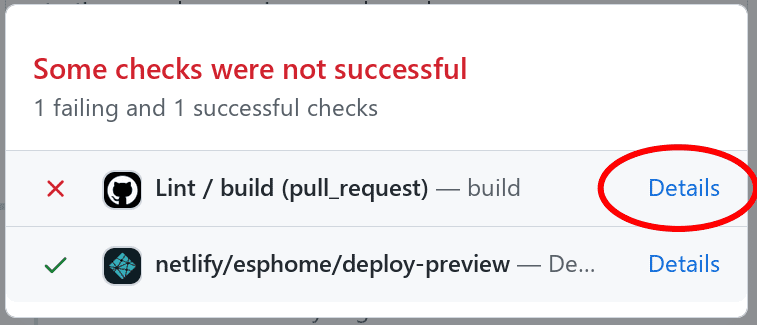
After a few minutes, you'll see either a green check ✅ or a red ❌ next to your commit in your pull request:

If you see the red ❌, there is at least one error preventing your pull request from being fully processed. Click on the ❌, then click on "Details" next to the lint step to determine what's wrong with your change(s).
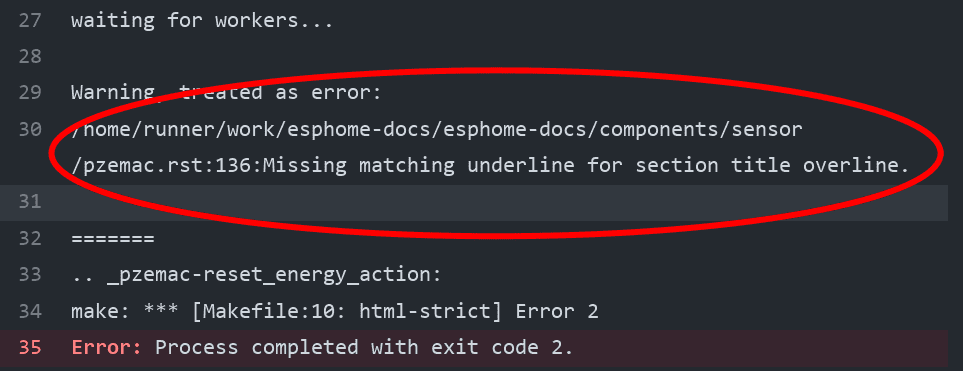
In this example, you need to go to line 136 of pzemac.rst and adjust the number of === so that it completely
underlines the section heading.
Once you make that change, the pull request will be tested & built again; ideally, this time where will be no remaining errors. If, however, more errors are discovered, simply repeat the process above to correct them.
Note
All tests must be passing before we will review (and merge) a pull request.
Build
Note
The easiest way is to use the esphome-docs container image:
docker run --rm -v "${PWD}/":/workspaces/esphome-docs -p 8000:8000 -it ghcr.io/esphome/esphome-docs
...with PWD referring to the root of the esphome-docs git repository. Then, to see the preview, go to
<HOST_IP>:8000 in your browser.
This way, you don't have to install the dependencies to build the documentation.
To check your documentation changes locally, you first need install Sphinx (with Python 3).
# in ESPHome-Docs repo:
pip install -r requirements.txt
Then, use the provided Makefile to build the changes and start a live-updating web server:
# Start web server on port 8000
make live-html
General notes/guidelines
- Use the English language (duh...)
- An image is worth a thousand words, please use them wherever possible. Regardless, don't forget to optimize them so pages load quickly; you might try using https://tinypng.com/
- Try to use examples as often as possible.
- When using highly accurate, domain-specific terminology, be sure that it does not interfere with new users understanding the content.
-
Be sure to target the correct base branch of the
esphome-docsrepository: -
Fixes/improvements for documentation must target the
currentbranch. -
New features must target the
nextbranch. -
Create new branches in your fork for each pull request; to avoid confusion (and other potential issues), do not make changes directly in the
nextandcurrentbranches in your fork. - Wrap lines in all files at no more than 120 characters. This makes reviewing PRs faster and easier. Exceptions should be made only for lines which contain long links or other specific content/metadata that cannot be wrapped.
rST syntax
Here's a quick RST primer:
Title hierarchy is based on order of occurrence, not on type of character used to underline it. For consistency, we adhere to the following order:
Headers
You can write titles like this:
My Title
========
and section headers like this:
My Section
----------
and sub-section headers like this:
My Sub-section
**************
and sub-sub-section headers like this:
My Sub-sub-section
^^^^^^^^^^^^^^^^^^
Note
- The length of the bar below the text must match the title text length.
- Section titles should use Title Case.
Links
Create a link to an external resource (for example: https://www.google.com) like this:
`Google.com <https://www.google.com>`__
Note
Referral links are only permitted if they provide a direct benefit to the ESPHome project. This policy applies to all official ESPHome documentation and websites.
References
To reference another document, use the :doc: and :ref: roles (references are set up globally
and can be used between documents):
.. _my-reference-label:

Section to cross-reference
--------------------------

See :ref:`my-reference-label`, also see :doc:`/components/switch/gpio`.
:doc:`Using custom text </components/switch/gpio>`.
See Supported Microcontrollers, also see GPIO Switch. Using custom text.
Inline code
To have text appear like this, use double backticks:
To have text appear ``like this``, use double backticks.
To have text appear like this, use double backticks.
Code blocks
To show a sample configuration file, use the code-block directive:
.. code-block:: yaml

    # Sample configuration entry
    switch:
      - platform: gpio
        name: "Relay #42"
        pin: GPIOXX
# Sample configuration entry
switch:
  - platform: gpio
    name: "Relay #42"
    pin: GPIOXX
Note
Note that a blank line is required after every code-block directive.
Collapsible section
To add a collapsible section, use the collapse directive:
.. collapse:: Details

    Something small enough to escape casual notice.
.. collapse:: A long code block

    .. code-block:: yaml

        # Sample configuration entry
        switch:
          - platform: gpio
            name: "Relay #42"
            pin: GPIOXX
The :open: flag can be used to have the section open by default.
.. collapse:: Open
    :open:

    This section is open by default.
Note
- The
:open:flag must immediately follow thecollapsedirective without a blank line between them. - A blank line is required after every
collapsedirective.
Tabs
To group content into tabs, use the tabs directive. The tabs directive defines a tab set.
Basic tabs are added using the tab directive (without s), which takes the tab’s label as an argument:
.. tabs::

    .. tab:: Apples

        Apples are green, or sometimes red.

    .. tab:: Pears

        Pears are green.

    .. tab:: Oranges

        Oranges are orange.
Tabs can also be nested inside one another:
.. tabs::

    .. tab:: Stars

        .. tabs::

            .. tab:: The Sun

                The closest star to us.

            .. tab:: Proxima Centauri

                The second closest star to us.

            .. tab:: Polaris

                The North Star.

    .. tab:: Moons

        .. tabs::

            .. tab:: The Moon

                Orbits the Earth

            .. tab:: Titan

                Orbits Jupiter
Note
- A blank line is required after every
tabsdirective. - The contents of each tab can be displayed by clicking on the tab that you wish to show. Clicking again on the tab that is currently open will hide its content, leaving only the tab set labels visible.
- For advanced features like tab-groupings, refer to https://sphinx-tabs.readthedocs.io/en/latest/
Images
Use the figure directive to display an image:
.. figure:: images/dashboard_states.png
    :align: center
    :width: 40.0%

    Optional figure caption.
Note
All images in the documentation need to be as small as possible to minimize page load times. Typically, the maximum size should be roughly 1000x800 px or so. Additionally, please use online tools like tinypng or tinyjpg to further compress images.
Notes and warnings
You can create simple notes and warnings using the note and warning directives:
.. note::

    This is a note.

.. warning::

    This is a warning.
Note
This is a note.
Warning
This is a warning.
Italic and boldface font families
To italicize text, use one asterisk around the text. To put a strong emphasis on a piece of text, put two asterisks around it.
*This is italicized.* (A weird word...)

**This is very important.**
This is italicized. (A weird word...)
This is very important.
Ordered and unordered lists
The syntax for lists in RST is more or less the same as in Markdown:
- Unordered item

  - Unordered sub-item

- Item with a very long text so that it does not fully fit in a single line and
  must be split up into multiple lines.

1. Ordered item #1
2. Ordered item #2
-
Unordered item
- Unordered sub-item
-
Item with a very long text so that it does not fully fit in a single line and must be split up into multiple lines.
-
Ordered item #1
- Ordered item #2
imgtable
ESPHome uses a custom RST directive to show the table on the main documentation page (see
components/index.rst). New pages need to
be added to the imgtable list. The syntax is CSV with <PAGE NAME>, <FILE NAME> (without RST), <IMAGE> (in the
top-level images/ directory), <COMMENT> (optional; short text to describe the component). The aspect ratio of these
images should be 8:10 (or 10:8) but exceptions are possible.
Because these images are served on the main page, they need to be compressed heavily. SVGs are preferred over JPGs and JPGs should be no more than 300x300px.
If you have imagemagick installed, you can use this command to convert the thumbnail:
convert -sampling-factor 4:2:0 -strip -interlace Plane -quality 80% -resize 300x300 in.jpg out.jpg
reStructured text can do a lot more than this; if you're looking for a more complete guide, please have a look at the Sphinx reStructuredText Primer.